Crunchy Delights: Master the Art of Making Onion Rings with Our Step-by-Step Guide
- Gather the Ingredients: What You'll Need for Perfect Onion Rings
- Preparing the Onions: Slicing and Separating the Rings
- Creating the Batter: A Simple and Flavorful Mixture
- Dipping and Coating: Ensuring Even and Crispy Onion Rings
- Frying the Rings: Achieving the Perfect Golden Brown Color
- Draining and Seasoning: Adding the Final Touches to Your Onion Rings
- Serving and Enjoying: Best Ways to Serve and Savor Your Homemade Onion Rings
Onion rings are a beloved snack that has captured the hearts and taste buds of food lovers around the world. With their crispy exterior and tender, flavorful interior, these golden delights are a true culinary masterpiece. Whether enjoyed as an appetizer, side dish, or even as a main course, onion rings never fail to satisfy cravings for something crunchy and delicious. In this step-by-step guide, we will unveil the secrets to creating perfect onion rings that will leave you craving for more. Get ready to embark on a journey of culinary bliss as we delve into the art of making onion rings at home.
Gather the Ingredients: What You'll Need for Perfect Onion Rings
To create the perfect onion rings, you'll need a few key ingredients. First and foremost, you'll need onions. Choose large, sweet onions such as Vidalia or Walla Walla for the best flavor. You'll also need all-purpose flour, which will help create a crispy coating for the rings. For added flavor, have some cornmeal or breadcrumbs on hand. To give your batter a little kick, gather some spices like paprika, garlic powder, and cayenne pepper. Finally, don't forget salt and pepper to season the rings to perfection. With these ingredients in your kitchen arsenal, you're ready to embark on your onion ring-making adventure!
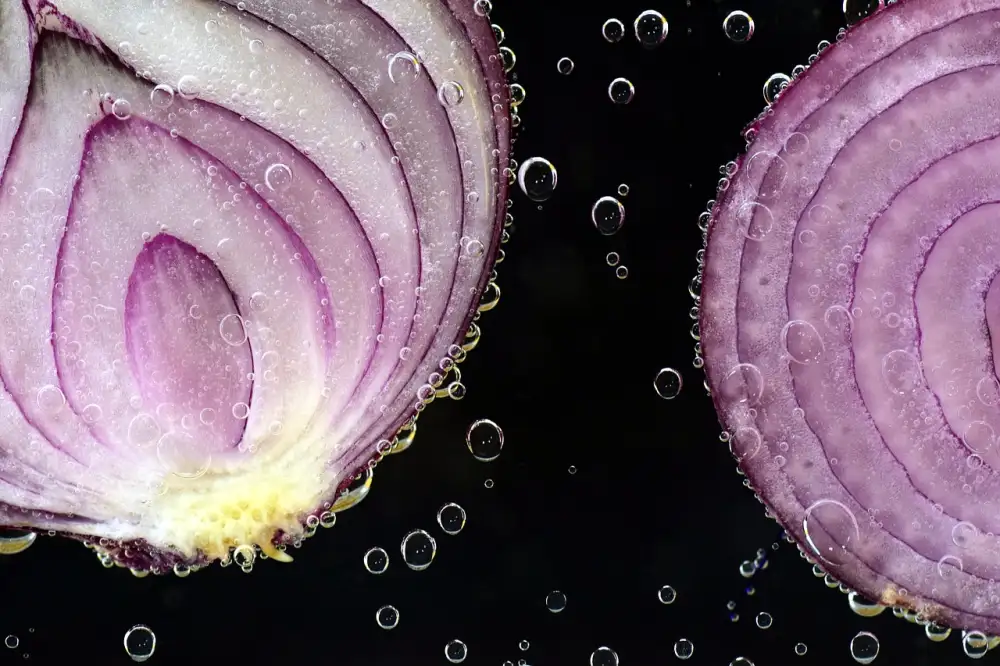
Preparing the Onions: Slicing and Separating the Rings
To prepare the onions for your homemade onion rings, start by choosing large, firm onions. The ideal variety is a sweet onion, such as Vidalia or Walla Walla.
Begin by cutting off both ends of the onion and peeling away the outer skin. This will reveal the layers of the onion, which we will use to create the rings.
Using a sharp knife, make a horizontal cut about 1/2 inch from one end of the onion. Then, gently peel away the first layer of the onion. This will be your first onion ring.
Continue making horizontal cuts and peeling away each layer until you reach the other end of the onion. You can discard any smaller inner rings that are too small to use.
Separate all of the rings and set them aside for later use. It's important to keep them intact and not break them apart as this will ensure even cooking and a perfect texture in your final dish.
By following these steps, you'll have beautifully sliced and separated onion rings ready to be coated and fried to perfection.
Creating the Batter: A Simple and Flavorful Mixture
The key to achieving deliciously crispy onion rings lies in the batter. It needs to be light, yet sturdy enough to coat the onions evenly. To create the perfect batter, you'll need a few basic ingredients.
Start by combining all-purpose flour, cornstarch, baking powder, salt, and your choice of spices in a mixing bowl. The spices can vary depending on your taste preferences. Some popular options include paprika, garlic powder, cayenne pepper, or even dried herbs like thyme or oregano.
Next, slowly add cold sparkling water or beer into the dry ingredients while whisking gently. The carbonation in the sparkling water or beer helps create a light and airy texture in the batter. Keep whisking until you achieve a smooth consistency without any lumps.
For an extra flavor boost, you can also add some grated Parmesan cheese or finely chopped fresh herbs like parsley or chives to the batter mixture.
Once your batter is ready, let it rest for about 10 minutes. This allows the ingredients to meld together and ensures a better coating for your onion rings.
Remember that the consistency of your batter is crucial. It should be thick enough to cling onto the onions but not too thick that it becomes gloopy. If it's too thin, add more flour; if it's too thick, add a little more sparkling water or beer.
By mastering this simple yet flavorful batter recipe, you're well on your way to creating onion rings that will impress even the most discerning food lovers.
Dipping and Coating: Ensuring Even and Crispy Onion Rings
Once you have prepared the batter, it's time to dip and coat your onion rings. This step is crucial in ensuring that your onion rings turn out crispy and evenly coated. Start by taking a few onion rings and dipping them into the batter, making sure they are fully submerged. Use a fork or tongs to gently lift the rings out of the batter, allowing any excess to drip off. Next, carefully place the battered rings into a bowl of breadcrumbs or panko crumbs. Roll them around until they are completely coated, pressing lightly to ensure the crumbs adhere well. Repeat this process with the remaining onion rings, working in small batches to maintain consistency. By following these steps, you will achieve perfectly coated and crunchy onion rings that will leave your taste buds craving for more.
Frying the Rings: Achieving the Perfect Golden Brown Color
To achieve the perfect golden brown color, it is essential to fry the onion rings at the right temperature. Heat a deep pot or skillet with vegetable oil to around 375°F (190°C). Carefully drop a few onion rings into the hot oil, making sure not to overcrowd the pot. Fry them for about 2-3 minutes, flipping them halfway through, until they turn a beautiful golden brown. Use a slotted spoon or tongs to remove the fried rings and place them on a paper towel-lined plate to absorb any excess oil. Repeat this process in batches until all the rings are fried to perfection. Remember, maintaining the correct frying temperature is key to achieving that irresistible crunchy texture and golden hue.
Draining and Seasoning: Adding the Final Touches to Your Onion Rings
Once your onion rings have achieved the perfect golden brown color, it's time to drain them and add the final touches. Place the fried onion rings on a paper towel-lined plate or wire rack to remove any excess oil. This step is crucial as it ensures that your onion rings remain crispy and not greasy.
While the onion rings are still hot, season them with salt and any other desired spices or herbs. A sprinkle of garlic powder, paprika, or cayenne pepper can add an extra kick of flavor. Feel free to get creative and experiment with different seasonings to suit your taste preferences.
Gently toss the seasoned onion rings to evenly distribute the seasoning. This will ensure that every bite is bursting with delicious flavors. Allow the onion rings to cool slightly before serving to avoid burning your mouth.
Now that you've added the final touches, your homemade onion rings are ready to be enjoyed! Serve them as a side dish alongside burgers, sandwiches, or even as a tasty snack on their own. Don't forget to provide dipping sauces such as ketchup, ranch dressing, or barbecue sauce for an extra burst of flavor.
By mastering the art of making onion rings at home, you can indulge in this crunchy delight anytime you want. So gather your ingredients, slice those onions, create that flavorful batter, fry them to perfection, and don't forget to add those final touches for a truly satisfying culinary experience.
Serving and Enjoying: Best Ways to Serve and Savor Your Homemade Onion Rings
Once you have mastered the art of making homemade onion rings, it's time to serve and savor your crunchy delights. There are several ways to enjoy these golden-brown beauties.
Firstly, you can serve them as a standalone appetizer. Arrange the onion rings on a platter with a side of tangy dipping sauce such as aioli or spicy ketchup. The combination of crispy exterior and tender onion inside will surely impress your guests.
Another option is to use the onion rings as a topping for burgers or sandwiches. Simply place a few rings on top of your favorite patty or fillings, adding an extra layer of texture and flavor. The crunchiness of the rings pairs perfectly with the juiciness of the meat.
For those looking for a more creative twist, try incorporating the onion rings into other dishes. Chop them up and sprinkle them over salads or use them as a garnish for soups and stews. The added crunch will elevate any dish to new heights.
Lastly, don't forget to savor your homemade onion rings while they're still warm and crispy. The contrast between the crunchy exterior and the sweet, soft onion inside is truly irresistible. Take small bites to fully appreciate the flavors and textures.
In conclusion, serving and enjoying your homemade onion rings is all about creativity and savoring each bite. Whether served as an appetizer, used as a topping, incorporated into other dishes, or enjoyed on their own, these crispy delights are sure to please any food lover's palate. So go ahead, indulge in this culinary masterpiece you've created!
In conclusion, mastering the art of making onion rings at home is a delightful and rewarding experience. By following our step-by-step guide, you can create crispy and flavorful onion rings that will impress your family and friends. Remember to gather the right ingredients, slice and separate the onions carefully, create a delicious batter, dip and coat evenly, fry to perfection, drain and season well. The final result will be golden brown onion rings that are both visually appealing and irresistibly crunchy. So why not try your hand at making these crunchy delights in the comfort of your own kitchen? Happy cooking!
Published: 26. 11. 2023
Category: Food